Skill guide · Shelter & Structural Safety
Emergency Shelter Basics
Two different problems: hardening the shelter you already have against extreme wind, and improvising one if you don't have your home to rely on at all. This is the hands-on side of the Shelter & Structural Safety chapter and its addendum.
Download this guide as PDFHardening your home: safe rooms
FEMA's own standard for wind protection, developed after decades of tornado and hurricane damage assessment, is specific and demanding for a reason: a properly built safe room is designed to provide near-absolute protection even in an extreme tornado, resisting wind loads and flying debris at up to 250 mph regardless of what your local storm risk normally looks like.
- Location: a safe room can be built inside an existing home (often a reinforced closet, bathroom, or basement space) or added as a standalone structure; FEMA's guidance (publication P-320) covers both approaches for single- and two-family homes.
- Window and door protection: safe room openings must be tested to survive a 15-pound two-by-four fired at 100 mph without failing, which is a genuinely different standard than ordinary storm shutters or plywood.
- This is a construction project, not a weekend DIY job. FEMA explicitly recommends involving a licensed design professional, since site-specific conditions (soil, existing structure, local wind zone) all affect what a safe room actually needs to withstand.
Where to find it: FEMA's P-320 and P-361 publications are free and detail specific construction criteria; a licensed contractor or structural engineer familiar with safe room construction can use them directly. Some states and FEMA hazard mitigation grant programs have historically helped fund residential safe room construction, worth asking a local emergency management office about.
If you rent, or a real safe room isn't realistic
Improvising shelter when you don't have a building at all
A different problem: no home to harden, because you're stranded away from it entirely, a vehicle breakdown, or an evacuation that didn't go as planned.
The three things that actually matter
An improvised shelter is really just a system for fighting three specific ways your body loses heat, and getting all three wrong is how a survivable night becomes a dangerous one.
- Get off the ground. Bare earth pulls heat out of your body through direct contact (conduction) faster than cold air does. A layer of dry leaves, branches, a pack, or anything between you and the ground matters more than most people expect.
- Block the wind. Moving air strips heat away (convection). A shelter with gaps and drafts fights you the whole night; solid walls, even improvised ones, are what actually work.
- Stay dry. Wet skin or wet clothing loses heat through evaporation faster than almost anything else. Staying dry is usually the single biggest factor in avoiding hypothermia, more than temperature alone.
Fastest option: a tarp shelter
A simple lean-to, a tarp strung at an angle and staked or weighted at the edges, is the quickest shelter to build and works well as a wind and rain barrier above about 50°F. It won't retain body heat the way an enclosed structure does, so pair it with insulation underneath you and warm layers, not rely on it alone in genuinely cold conditions.
- Tie a ridgeline between two trees at roughly chest height, using a trucker's hitch (a slip loop partway down the line that the working end runs back through, giving you real leverage to pull the line drum-tight) so you can tension it without a second person.
- Drape the tarp over the ridgeline, one edge high against the line and the opposite edge angled down toward the ground on the side you want to block wind and rain from.
- Stake the low edge out at roughly a 45-degree angle from directly under the ridgeline, about 5 to 6 feet out, so the tarp forms an angled wall rather than lying flat.
- Secure each stake-out line with a taut-line hitch (a knot that grips under load but slides to re-tension by hand), so you can tighten the tarp again after the fabric stretches or a stake shifts.
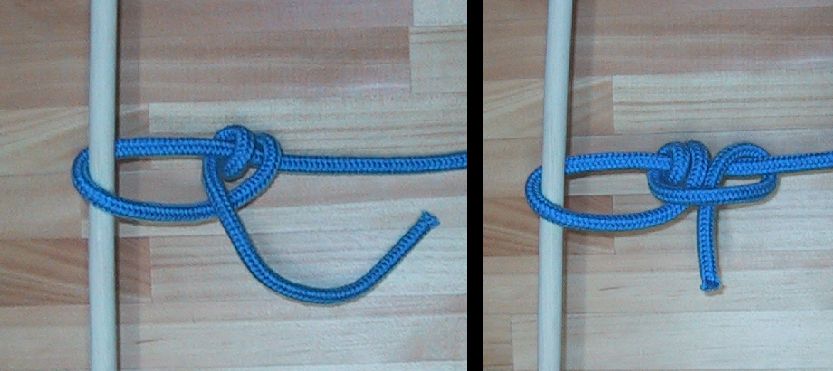
Trucker's hitch, taut-line hitch, and five more knots this site's guides assume you already know, actually taught step by step: see Basic Knots.
Watch it: REI, "4 Ways to Set Up an Ultralight Tarp Shelter".
Cold-weather option: a debris hut
When it's cold enough that wind and rain protection alone isn't enough, a debris hut is the standard improvised option, built to trap "dead air" around your body the same way a down jacket does.
- Find a ridge pole roughly a foot longer than you can reach with your arm stretched overhead, about 9 feet for someone 6 feet tall, strong enough to bear the weight of the debris piled onto it.
- Lean the ridge pole against a support (a low branch, a rock, a fallen log) at a height that leaves the frame body-sized once you account for the debris layer: just large enough to fit your body plus roughly 6 inches of debris on all sides, not a roomy interior. A smaller interior means less air volume your body has to warm.
- Rest smaller branches along both sides of the ridge pole, angled from the ground up to the ridge, to form a rib structure close enough together that the debris piled on top won't fall through.
- Pile dry leaves, grass, or other debris over the frame, 2 to 3 feet thick on all sides and the top. This is the actual insulation; a thin layer does very little.
- Fill the inside floor with the same dry debris before you get in, so you're insulated from the ground too, not just covered from above.
- Build or gather a door plug before you get in for the night: a bundle of debris tied together with pliable sticks or cordage, sized to fill the entrance, or simply a pile of loose debris (or your pack) positioned to pull in behind you. Without something plugging the entrance, the warm dead air the whole structure is built to trap just drains back out the opening.
Watch it: The Survival Summit, "How to Build a Debris Hut".
Deep-snow option: a quinzhee, when there's no debris to build with
A debris hut assumes leaves, branches, and bare ground to work with, exactly what's missing on a snowbound Utah mountain pass or a stranded vehicle above the snow line. A quinzhee (a hollowed-out snow mound) solves the same three problems, wind, ground contact, and staying dry, using nothing but the snow already there, and it insulates meaningfully better than an exposed tarp lean-to.
- Pile snow into a dome roughly 7 to 10 feet across and 5 to 7 feet high, then let it sit for at least an hour, ideally two, before hollowing it out. This "sintering" time lets the snow crystals bond into a load-bearing shell; digging in immediately risks a collapse.
- While it sinters, push a few dozen sticks about a foot long into the dome from the outside, all the way in. These become depth gauges once you're excavating from inside: stop hollowing the moment you see a stick tip, and you've left a wall of the right thickness everywhere.
- Dig the entrance low, on the downhill or downwind side, just large enough to crawl through; a low entrance traps warm air inside the same way a debris hut's door plug does.
- Hollow out the interior, sleeping platform slightly higher than the entrance so cold air sinks toward the door instead of pooling where you're lying.
- Push a stick straight up through the roof to open a ventilation hole a few inches across, and check that it's still open periodically, especially after fresh snowfall or drifting.
Warning
A closed snow shelter needs the same ventilation caution as any sealed room
Tip
A hard-plastic water bottle makes a real hot water bottle
Where to find it: a lightweight tarp, paracord or similar cordage, and a compact emergency bivy or mylar space blanket are all inexpensive, pack small, and are sold at any outdoor retailer; keeping one in a car or bag costs almost nothing and covers the tarp-shelter option even with zero natural materials around.
This is a backup, not a plan
Write your own plan, in one sentence
Deciding where to go under stress is slower than deciding it now, once, calmly. Finish this sentence with your own real plan:
"If , I will go to ."
Saved, only in this browser, for you to come back to.
Sources
- FEMA, safe room design and construction criteria (P-320, P-361): FEMA; FEMA P-320 (PDF)
- FEMA, best-available-refuge guidance for homes without a safe room: FEMA
- Heat-loss mechanisms and improvised shelter principles: Princeton Outdoor Action Guide
- Debris hut construction and insulation depth: Yost Survival Skills
- Debris hut ridge pole length, interior sizing, and door-plug technique: NatureOutside; Wilderness College
- Tarp lean-to ridgeline, trucker's hitch, taut-line hitch, and stake angle: REI; Tarp Supply
- Hard-bottle hot water bottle technique for a sleeping bag: Backpacker; Hunting Waterfalls
- Quinzhee construction, sintering time, stick-depth-gauge technique, wall thickness, and ventilation hole safety: NOLS; Wikipedia