Skill guide · Shelter & Structural Safety
Basic Knots
Emergency Shelter Basics tells you to secure a tarp ridgeline with a trucker's hitch and stake it out with a taut-line hitch. Other guides across this site mention a clove hitch, a bowline, tying off a line. None of them actually teach the knot itself, they assume you already know it. This guide is that missing skill: seven real knots, with real illustrations and the actual steps, not just the name.
Download this guide as PDFPractice on a real piece of rope before you need one of these for real
Two terms used throughout: the working end is the part of the rope you're actively tying with; the standing part is the length of rope not being worked, usually under load.
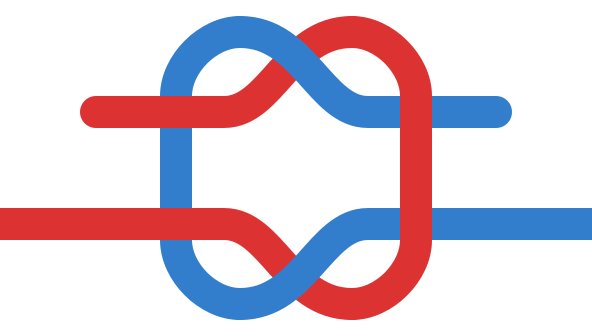
Square knot (reef knot): binding, not joining
The knot most people already half-know from tying shoelaces or a bandage. It's for binding something closed, cinching a bundle, tying off a bandage, securing a rolled tarp, not for joining two ropes that will bear real load.
- Hold one rope end in each hand.
- Cross the right end over the left and tuck it under, then pull both ends to snug the first half.
- Cross what's now the left end over the right and tuck it under.
- Pull all four ends (two working ends, two standing ends) to tighten. Done correctly, the two loops that form lie flat and parallel; if they twist into an "S" shape instead, you've tied a granny knot, which slips far more easily, undo it and redo the second cross the other way.
Warning
Don't use a square knot to join two ropes under load
Bowline: a fixed loop that won't tighten under load
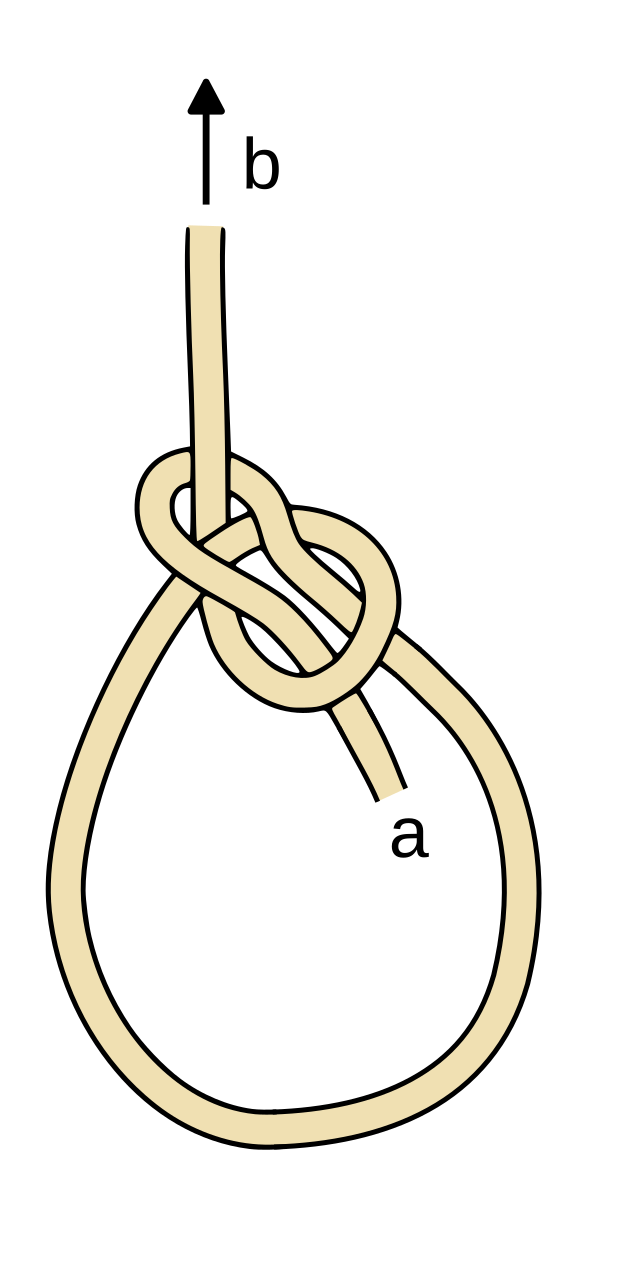
The knot to reach for anytime you need a loop at the end of a rope that stays a fixed size no matter how hard it's pulled, a rescue loop, a loop around a post, the end of a line you're about to throw. Unlike a slip knot, the loop it makes cannot cinch down and choke.
- Make a small loop in the rope a short distance from the end, the "hole," with the working end coming up through it.
- Pass the working end up through that loop from underneath, the classic mnemonic: the rabbit comes up out of the hole.
- Wrap the working end behind the standing part of the rope, around the "tree."
- Bring the working end back down through the same small loop it started in, the rabbit goes back down the hole.
- Pull the standing part and the loop's two strands separately to dress the knot, then pull hard on the standing part and the loop together to set it.
Warning
A bowline can work itself loose with no load on it at all
Clove hitch: quick, adjustable, not fully trustworthy alone
The fast way to start or end a lashing, or to tie a line to a post or pole when you'll want to adjust or untie it again soon. It's not a knot to trust alone for a load that could shift direction or go slack and snap tight again.
- Wrap the working end around the pole or post once, crossing over itself to form an X on the front.
- Wrap around the pole a second time, in the same direction, laying the new wrap just to one side of the X.
- Tuck the working end under that second wrap, passing it through the X you formed in step 1.
- Pull both ends to snug the hitch tight against the pole.
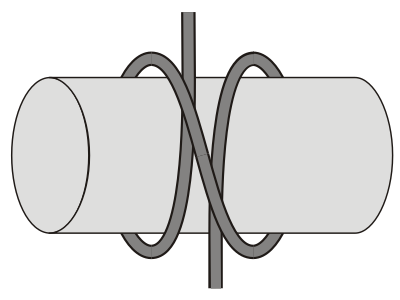
For anything that needs to actually hold, a shelter ridgeline, a load you can't watch constantly, back a clove hitch up with a couple of half hitches on the working end, or use two half-hitches from the start instead.
Two half-hitches: securing a line end, plain and reliable
The plain, dependable way to tie a rope's end off to an anchor, a tent stake, a post, a tree, when you want it to actually stay tied. Less adjustable than a clove hitch, more trustworthy.
- Pass the working end around the anchor.
- Bring it up and over the standing part, then back through the loop that creates, that's one half-hitch.
- Repeat the same wrap a second time, right next to the first, that's the second half-hitch.
- Slide both hitches snug against the anchor and pull the standing part to set them.
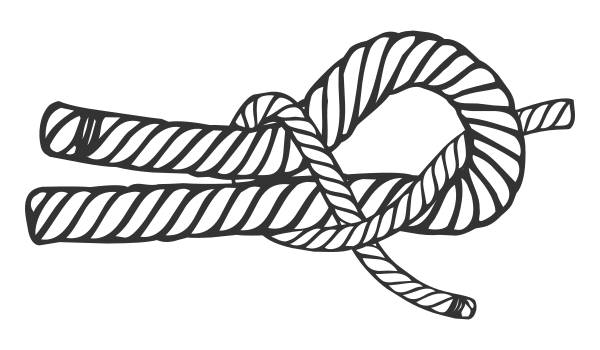
Sheet bend: joining two ropes of different sizes
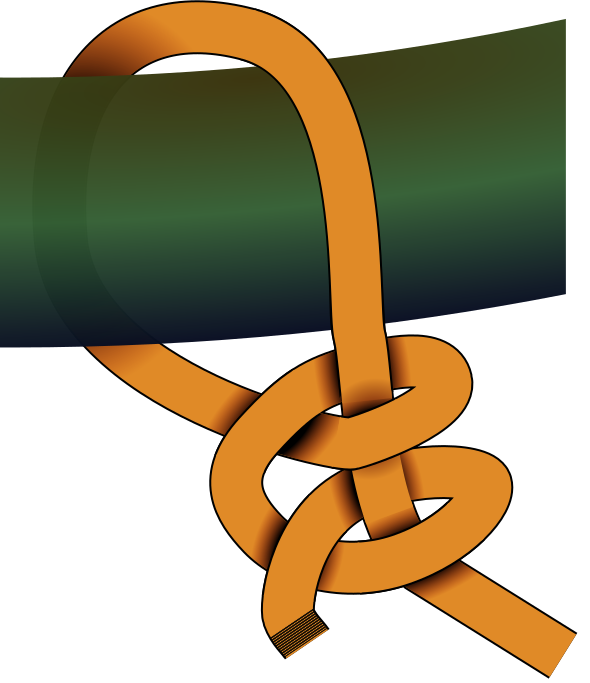
The real answer to "how do I tie two ropes together," especially when they're different diameters or materials, exactly the case a square knot fails at. A length of paracord to a length of clothesline, a thin guyline to a thicker ridgeline.
- Form a bight (a U-shaped fold) in the end of the thicker rope and hold it.
- Pass the working end of the thinner rope up through that bight.
- Wrap the thinner rope's working end around behind the entire bight.
- Tuck the working end under itself, where it first crossed the bight, so both working ends end up on the same side of the finished knot.
- Pull the thicker rope's bight and the thinner rope's standing part apart to snug it tight.
Warning
A sheet bend can shake loose with no load on it, same weakness as the bowline
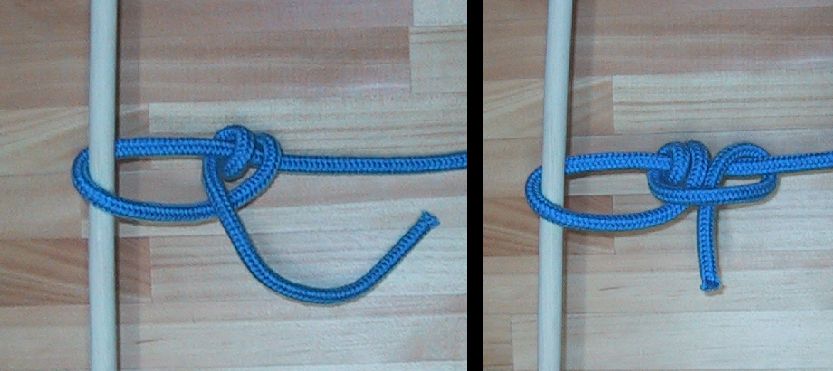
Taut-line hitch: an adjustable knot that grips under load and slides when it's slack
The knot Emergency Shelter Basics uses to stake out a tarp: it holds tension like a fixed knot but slides by hand to re-tension whenever the line stretches or a stake shifts, without ever having to retie it.
- Wrap the working end around the anchor (a stake, a tree), then around the standing part of the line, moving toward the anchor, twice.
- Wrap the working end around the standing part one more time, this wrap goes above the first two, closer to the load.
- Pull the whole hitch snug. Under tension it grips; with the tension released, slide the whole knot along the standing line by hand to lengthen or shorten it, then pull tight again to lock it back in place.
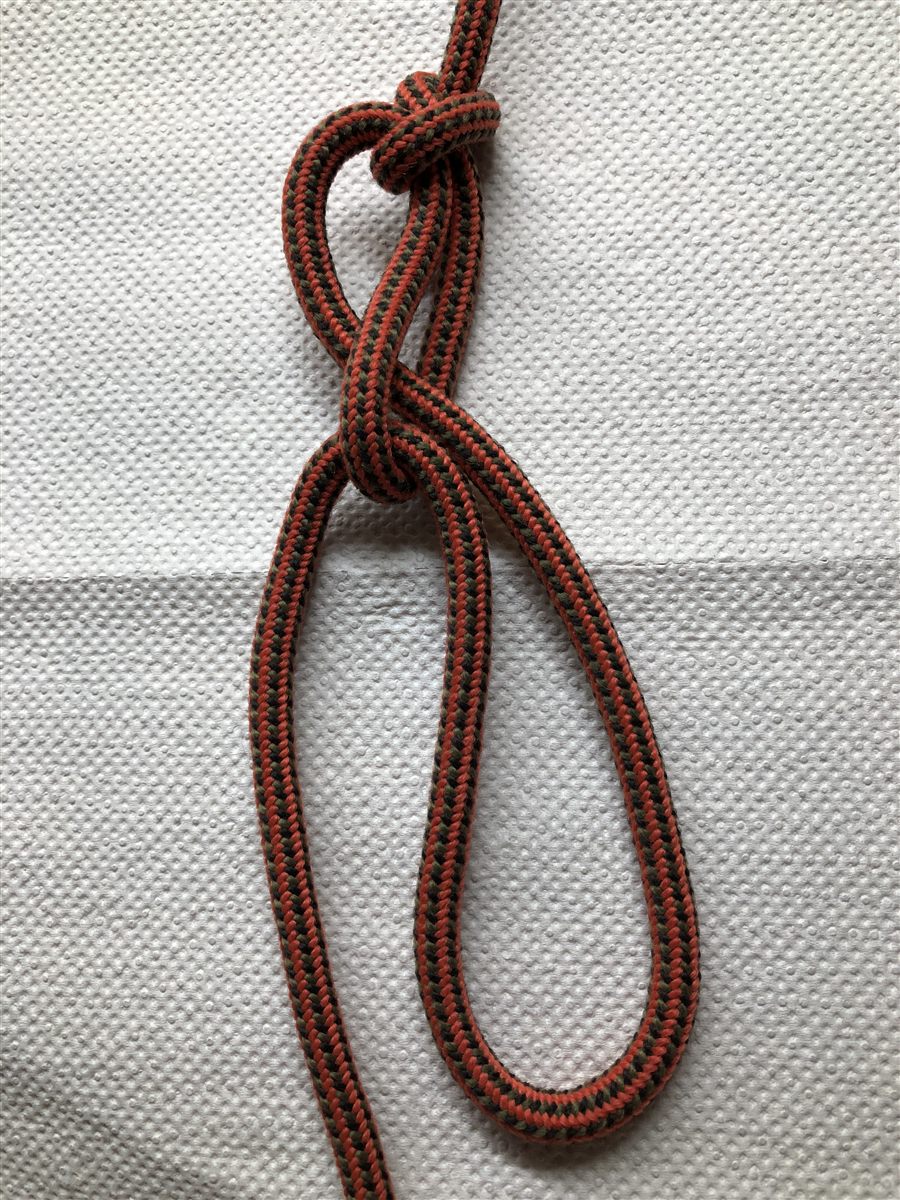
Trucker's hitch: real mechanical advantage for pulling a line drum-tight
The knot that lets one person tension a ridgeline, a tarp, or a load on a roof rack tighter than they could ever pull by hand alone, the same hitch Emergency Shelter Basics uses to tension a tarp ridgeline between two trees.
- Anchor one end of the line to a fixed point with a bowline or by tying off around it.
- A few feet from the second anchor point, twist a loop into the standing part of the line, a simple slip loop works, though it can jam under real load; a directional figure-eight-on-a-bight is more secure and still easy to untie afterward.
- Run the working end around the second anchor point and back through that loop.
- Pull the working end to draw the line tight, the loop acts as a pulley, giving real (if friction-reduced) mechanical advantage over pulling the line by hand alone.
- Holding the tension, secure the working end with two half-hitches around the taut lines just below the loop so it can't release.
Watch it: a full tying sequence is easier to follow in motion than in still steps; Animated Knots by Grog and most outdoor-retailer YouTube channels cover this exact hitch start to finish.
Write your own plan, in one sentence
Reading seven knots once isn't the same as your hands knowing any of them. Finish this sentence with your own real plan:
"This week, I will practice until I can tie ."
Saved, only in this browser, for you to come back to.
Sources
- Square/reef knot vs. granny knot, and capsizing failure mode: Wikipedia
- Bowline tying steps and the "rabbit and the tree" mnemonic: NetKnots; loosening-when-slack weakness and the Yosemite finish: Wikipedia
- Clove hitch tying methods and its need for backup under a shifting load: MasterClass; Wikipedia
- Two half-hitches technique: Wikipedia
- Sheet bend tying steps, working-ends-same-side requirement, and the double sheet bend for dissimilar rope sizes: Royal Museums Greenwich; Wikipedia
- Taut-line hitch wrap sequence and slide-to-adjust mechanism: Wikipedia
- Trucker's hitch construction, real-world mechanical advantage, and securing the working end: Animated Knots by Grog; Wikipedia
Working through this from Ready, Set, Ready? Head back to pick your next topic once this one's real.